Image Processing Module
The Image Processing Module (IPM) is responsible for analyzing a image and generating a result. This application is the brains of the vision platform. The IPM allows users to configure workspaces (IPM Workspaces) that handle the processing of images acquired for a specific inspection point. The workflow of each IPM Workspace is configurable using Cognex Vision Pro and Cognex Deep learning tools.
The tools and UI's presented by the IPM are all standard Cognex Deep Learning and Vision Pro tooling, and should be recognizable by anyone familiar with the Cognex platform. This document assumes that the reader is familiar with the Cognex PC vision platform.
Workspace Processing
Each workspace will process images in the following manner:
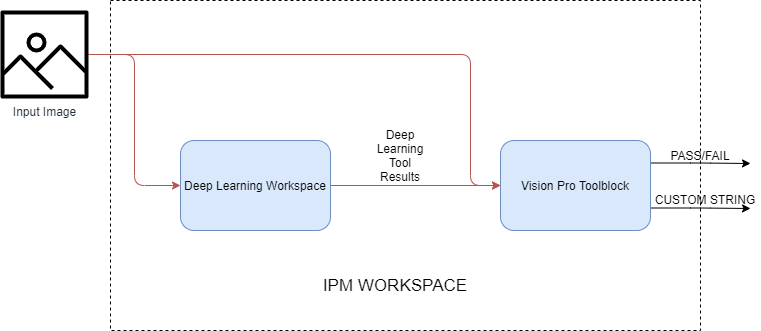
Deep Learning Workspace: A runtime cognex workpsace generated by Cognex Deep Learning. Sometimes called a Vidi Workspace.Vision Pro Toolblock: A collection of traditional vision tools that will combine the deep learning results into a single resultResults: These define the results of the workspace, reported back to the MVS Server, PLC and Camera. The PASS/FAIL result is either a booleanTrue/Falseoutput, or aCogResultConstantvalue such as the result output from aCogResultsAnalysisTool. The Output String value can be any string and is used to relay custom inspection data back to a PLC, or a custom message back to the device acquiring the image.
Creating A IPM Workspace
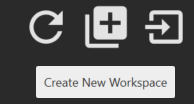
To create a new IPM Workspace, navigate to the Workspaces page in the IPM and click on the create new button.
Describe how to create a workspace on the IPM:
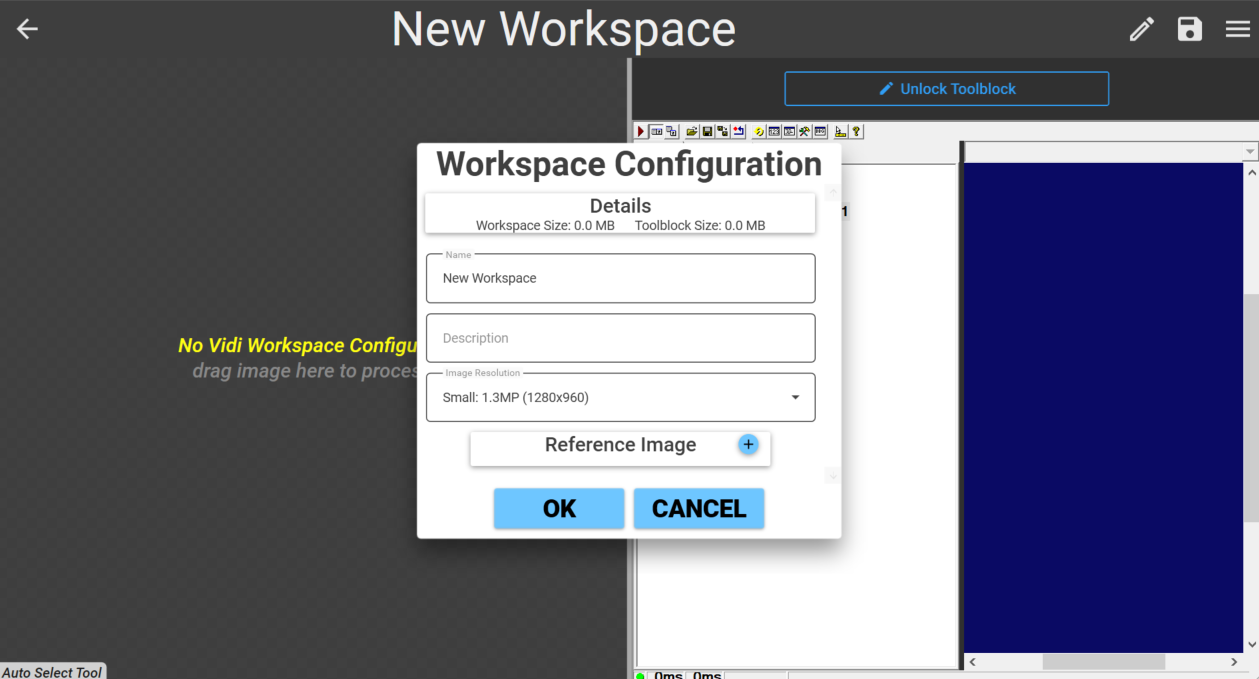
This will create a new workspace and open it in the Workspace Editor. Click on the edit details icon  to edit the details about this workspace:
Name: The display name of this workspace.Description: a description of the workspaceImage Resolution: The resolution to use for any cameras acquiring images to be processed on this workspace.Reference Image: The default reference image for this workspace, which can be passed into the reference image on a inspection point. This will also be used as the thumbnail for this workspace.
Importing a Deep Learning Workspace
Deep Learning workspaces need to be generated by the Cognex Deep Learning Studio, a application provided by Cognex. This is the standard tool for training Cognex Deep Learning models. For more information on this tool, see the Cognex support site.
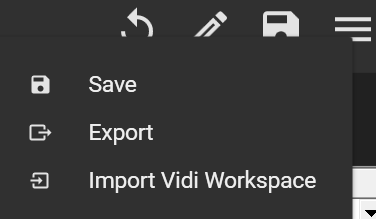
Once the Deep Learning Workspace is exported from Cognex Deep Learning Studio (File -> Create Runtime Workspace -> *.vrws file) it can be imported into the IPM Workspace by selecting the menu icon and clicking on Import Vidi Workspace.
This will populate the left side of the display with the Deep Learning tools that were imported from the file.
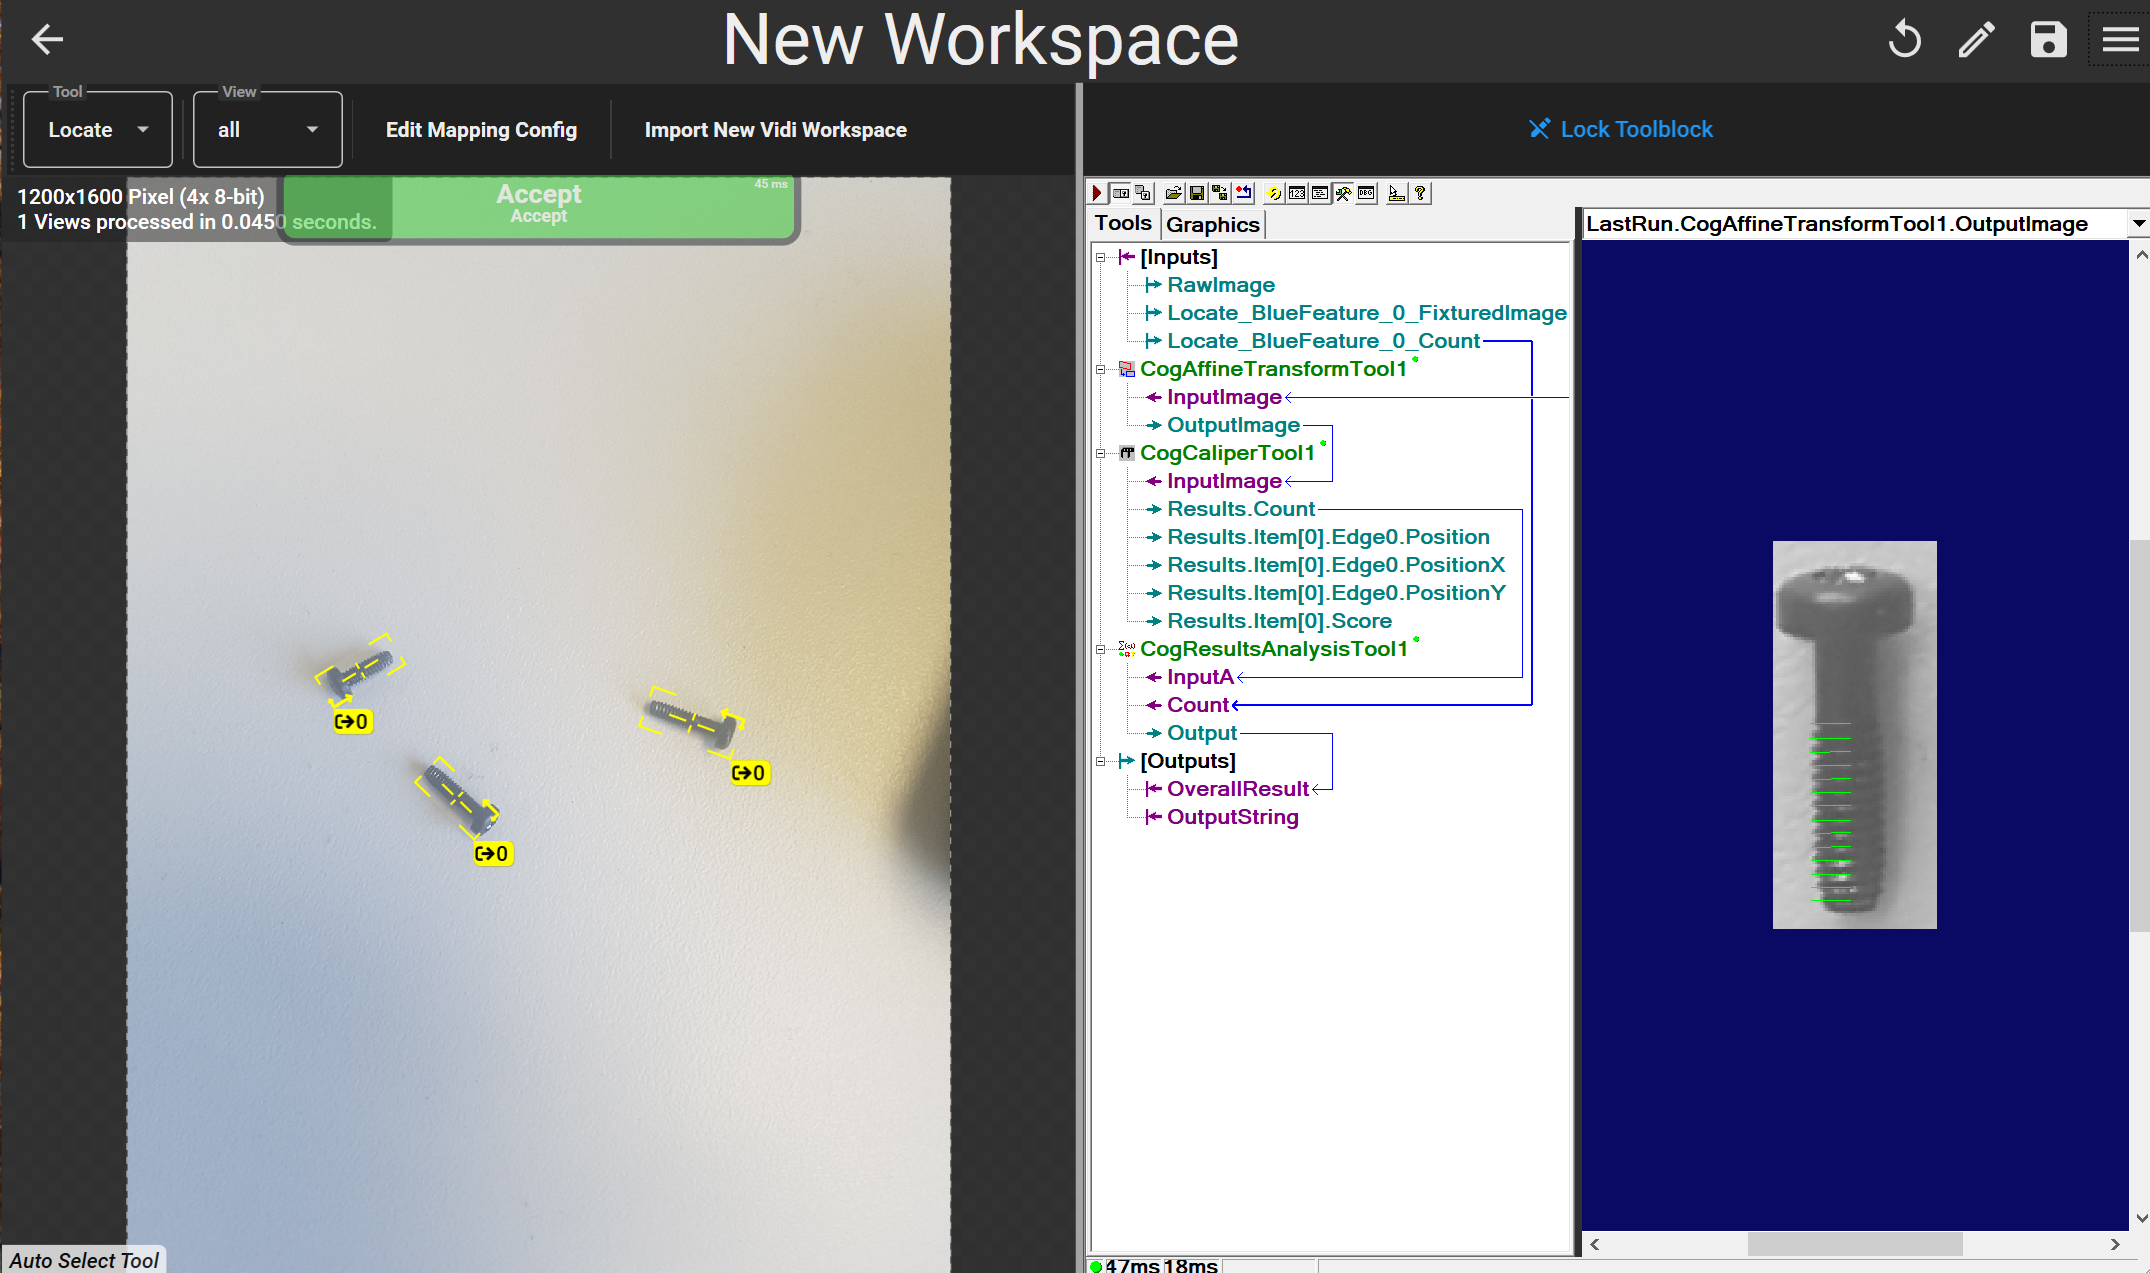
Mapping Configuration
The Mapping Config defines what results from the deep learning tools should be added to the toolblock as inputs.
In the below example the results of the Locate tool are being mapped, Feature '0' and a fixtured image based on the feature's location will be passed into the vision pro toolbock as inputs.
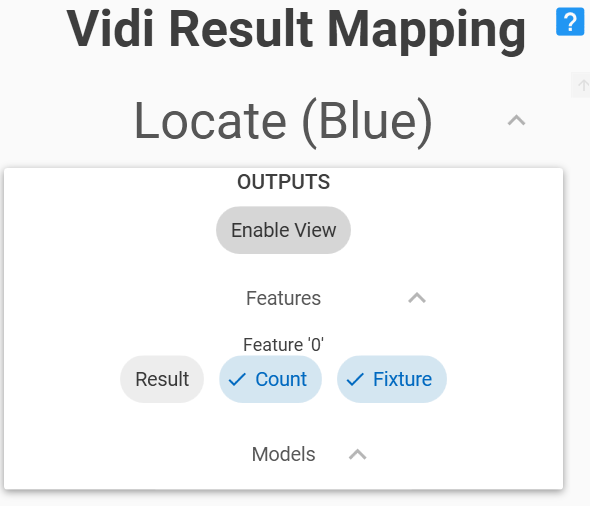
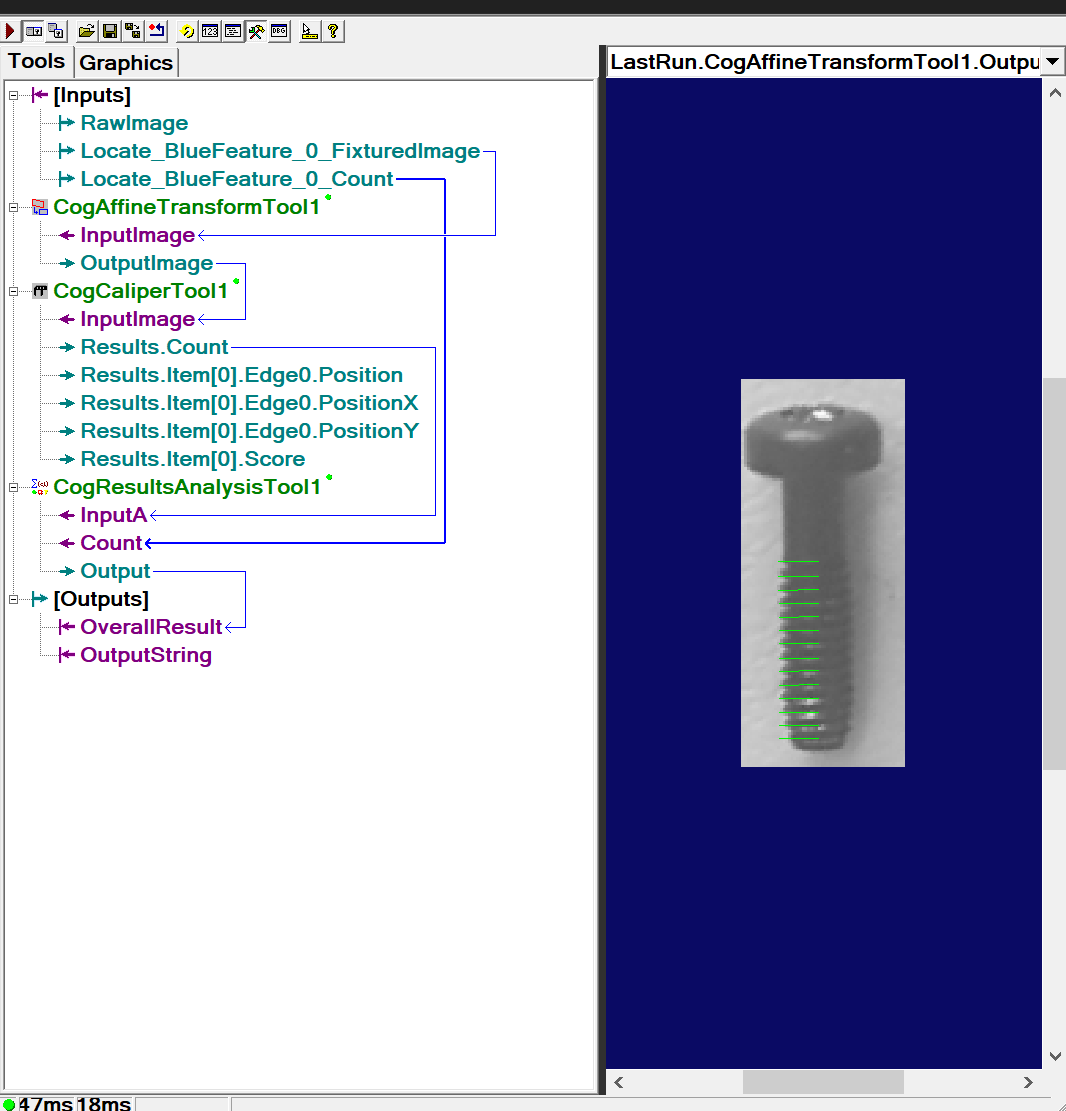
After confirming the mapping, the toolblock will now display the inputs. Next time the tool is ran these will be populated with results generated by the deep learning model.

Configuring The Toolblock
While the Vision Pro toolblock allows additional processing of the image/results through traditional vision tools, its primary purpose is to allow the user to apply custom logic to the deep learning results to generate a overall result for the image. There are two approaches for combining these results:
CogResultsAnalysisTool: This is a tool built into cognex that provides a GUI to configure basic logic operations on its inputs, and generate outputs. The output of this tool should be mapped to theOverallResultoutput of the toolblock. The below example uses aCogResultsAnalysisToolto combine multiple results into the single overall result of the tool.
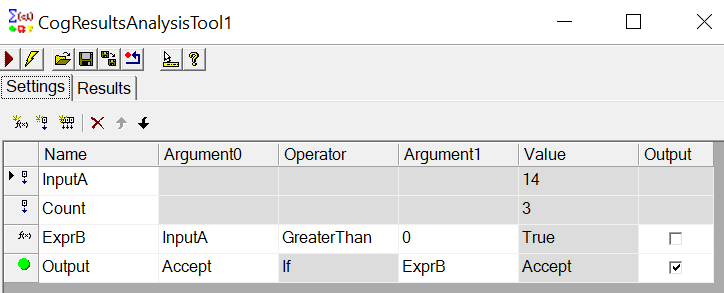
- For advanced users, toolblocks support C# or VB scripting to perform any arithmetic or logic operations required. The following example will set the output to
Acceptif theLocate_BlueFeature_0_Countinput is greater than 0.
  public override bool GroupRun(ref string message, ref CogToolResultConstants result)
  {
    // Run each tool using the RunTool function
    foreach(ICogTool tool in mToolBlock.Tools)
      mToolBlock.RunTool(tool, ref message, ref result);

    //Custom Logic
    var count = (int)mToolBlock.Inputs["Locate_BlueFeature_0_Count"].Value; //Read input terminal
    if (count > 0)
    {
        //Set result to accept
          mToolBlock.Outputs["OverallResult"].Value = Cognex.VisionPro.CogToolResultConstants.Accept;
    } else {
        //Set result to Reject
          mToolBlock.Outputs["OverallResult"].Value =  Cognex.VisionPro.CogToolResultConstants.Reject;
    }
    //End custom logic
    return false;
  }
Notes on Mapping Config
Rules and logic:
-
Using multiple views in vidi is not supported by the mapping to vision pro. In general each tool in a chain can only create a single view to be processed by any remaining tools. This can happen if you locate multiple features using a blue locate tool, and configure a child tool to create a view for each located feature. The processing will always look at view index
0when processing results, so avoid creating multiple views when fixturing (single feature or model only). Do not define more than one ROI for a tool. -
Processing and results will always be generated based on the
defaultstream. We currently do not support adding more streams to the vidi workspace. -
If multiple features or models are found in a image, and the mapping is configured to use the feature or model, the feature or model with the highest score will be used. This applies to
ResultsandFixturesbased on the feature or model.